Do you have plans to start an online store but don’t know where to begin from?
Is it stopping you from creating the online store of your dreams?
If this is you, not to worry!
This blog is a detailed guide on how to start your online e-commerce store using WordPress with ease. The beautiful thing about this is that you don’t have to be a programming guru to create one. Also, an online e-commerce store doesn’t require heavy capital. All you need is a working internet connection, and you’re good to go.
So guys, without further ado, let’s delve in, shall we?
Table of Contents
Starting your eCommerce Store with WordPress
Get your domain
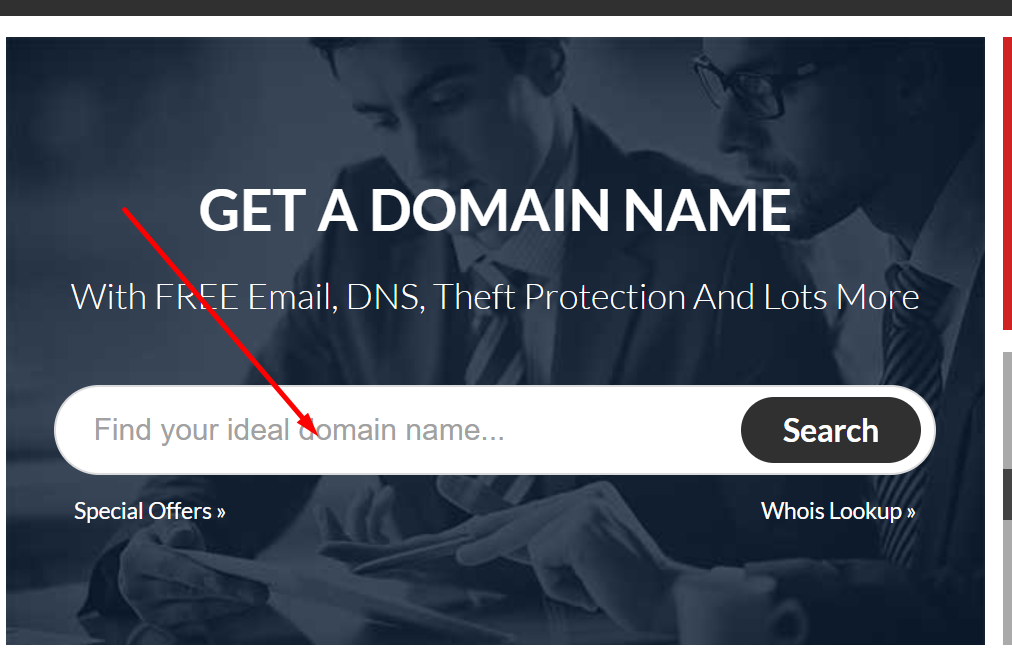
The first step in making an online WordPress Woo-Commerce store is to get your domain name. How can you find and register one? Don’t stress! I will guide you throughout.
Choose your domain name
Your domain name must be related either to the kind of business that you run or what you’re trying to promote, so you must make it unique and memorable. Also, make sure it somehow represents your brand.
A popular mistake that most newbies make is that they try to get similar domain names with their competitors, hoping to get traffic. You shouldn’t. A unique domain name will help you stand out in the long run.
Also, it shouldn’t be long. It should be short, meaningful, and unique. Fiding great domain names are very tough as these niches are very competitive. You can get expired domain names at affordable prices from expired domain sellers.
Wait, why getting right domain is so important ?
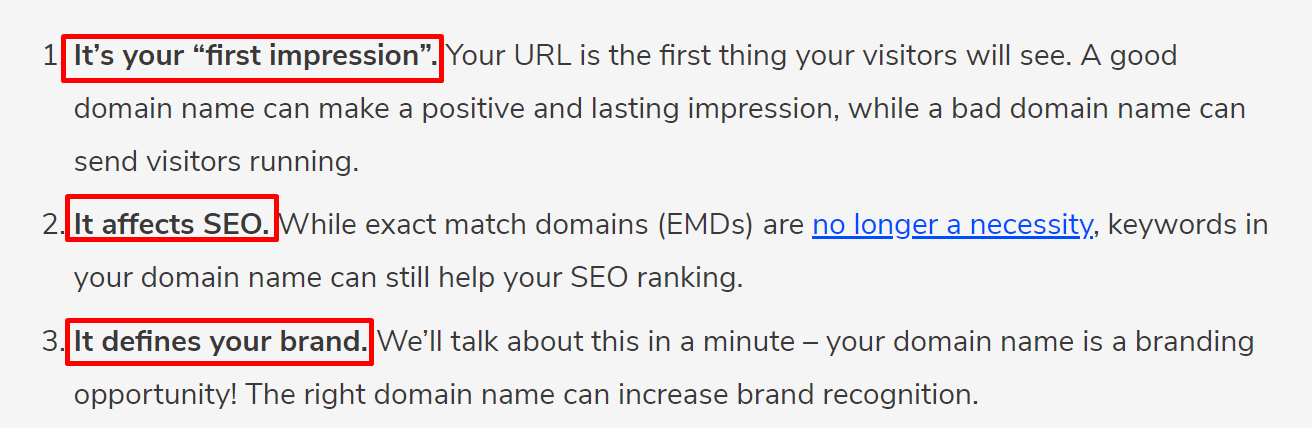
Use a top-level domain
What are high-quality top level domains?
They’re popular ones like .com, .NET, .org, etc.
If your brand is for a global market, then .com is your best bet. Organizations and agencies often use .org. If your brand is for your locale or country, then you can use specific domain names like .uk, .au, .ng, etc.
Using random domain extensions wouldn’t give your blog the traffic and attention it needs because people may feel it’s a spam site. Your e-commerce site must build trust at first sight.
Choose a good domain registrar
You can’t host a domain name without a registrar. Examples of popular domain registrars include:
Choose a great hosting service
You now have to choose the right hosting service provider and there are some things you need to consider, like their cost, how fast and reliable their service is, what’s the quality of their customer service in case you encounter issues along the way, and how are other customers rating them?
Hosting service providers for WordPress include Bluehost, HostGator, SiteGround, NameCheap, and Inmotion Hosting.
It might be hard for newbies to choose the right hosting service and providers. There are so many packages out there, so you have to know what you’re looking out for and define your budget, before choosing one.
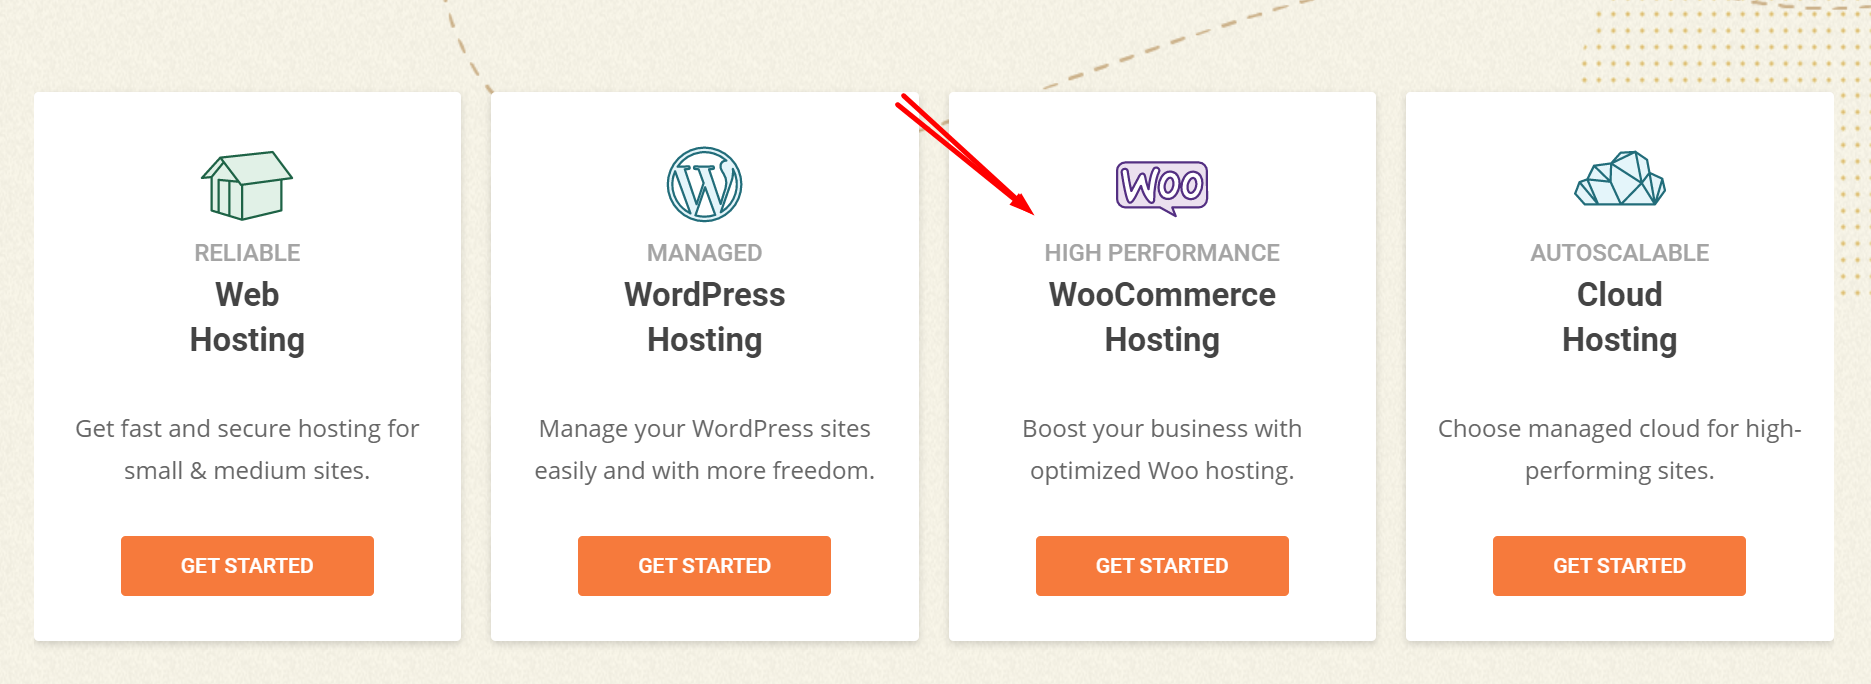
🟦 Compare the best hosting service for WordPress
You can either choose shared web hosting (which is the most common), VPS, or managed web hosting.
- Shared web hosting
Shared hosting involves hundreds or thousands of websites using one server and sharing common resources. This is why they’re affordable and popular. However, shared web hosting can be vulnerable to security threats and have slight server issues.
Hosting services like Inmotion hosting, Bluehost, HostGator and SiteGround have plans for shared hosting.
- VPS
VPS web hosting is similar to the shared one but in this case, the virtual private server is used without external security threats or side effects.
- Managed Web hosting on WordPress
In this hosting service, the caching, processor, memory, and software are in the same package.
WordPress Installation
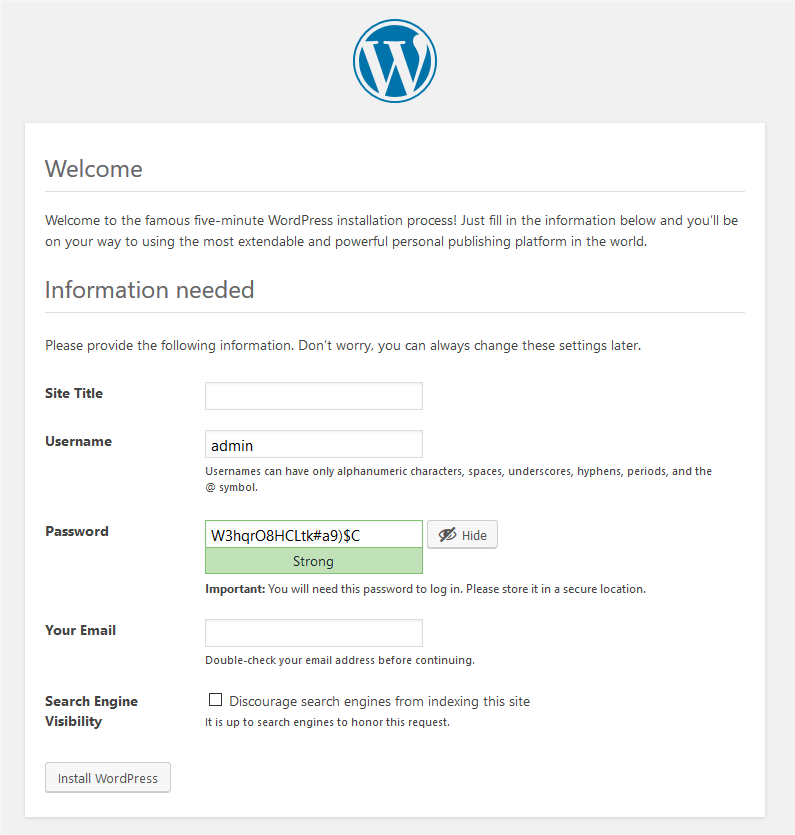
Now that you’ve chosen your domain name and hosting service provider, it’s time to install WordPress. Here are the steps:
- Sign in to the cPanel of your hosting service
- Look out for the one-click installation feature, and click on it. Most web hosts have it.
- Choose the registered domain and click on “continue”
- Insert the right website information
- Click on “install”
Setting up the domain
Once you’ve registered your domain and have your hosting package, the next thing to do is to set up the domain.
Note: If your domain registrar is also your hosting provider, then you can skip this step. The procedure is automatically done for you. But if they’re different, you have to point out or show your domain to your hosting service provider. You can do this by placing the right nameservers.
Steps to go through:
- Go to your domain registrar website and log in
- Move to your “domain”
- Select your domain from the list of domains provided
- Click on ‘Name Servers’
- Click on ‘Custom Name Servers’
- Insert the name of the new server
- Click on “Save”
Note that your hosting provider provides your name server. It takes roughly 60 – 72 hours for the name server to be functional.
Theme Installation
The creative part of your WordPress installation is here!
The WordPress dashboard is where the magic happens. It’s where you carry out all forms of customization to make an online store that suits your taste and brand. There are free WordPress themes for online stores. Just choose one and download it in a zipped format.
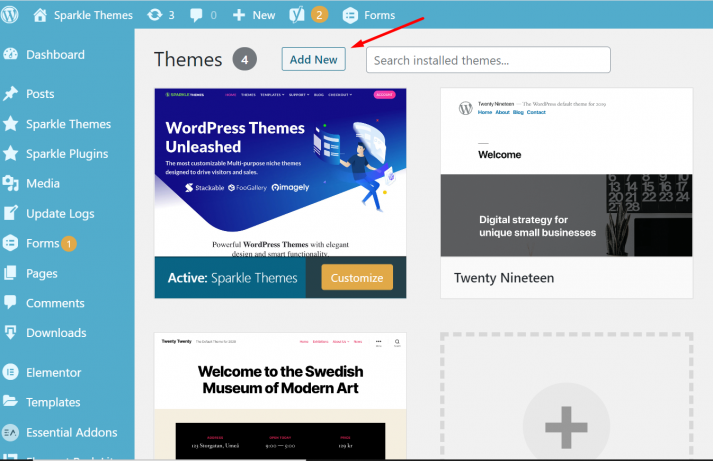
Simply follow these steps to successfully install your WordPress theme
- Go to the dashboard on WordPress
- Go to appearance
- Click on “Themes”
- Click on “Appearance”
- Click on “Upload Themes”
- Click on “Choose file”
- Look for the downloaded theme file (Note: it must be a zipped file)
- Upload the file
- Activate the file
Voila! Your theme is in use.
Now, you may be asking, “How do I choose an e-commerce theme that suits my brand?” Here are some questions to ask to help in the decision process:
- Is it visually appealing?
- Does it suit your brand or style?
- Is there space for text and graphic content?
- Can the theme be customized if need be?
- Can it suit different browsers?
- Can it respond to different devices?
These questions will help to streamline your options.
🟦 You may also want to check some of our awesome WordPress themes
Plugin Installation
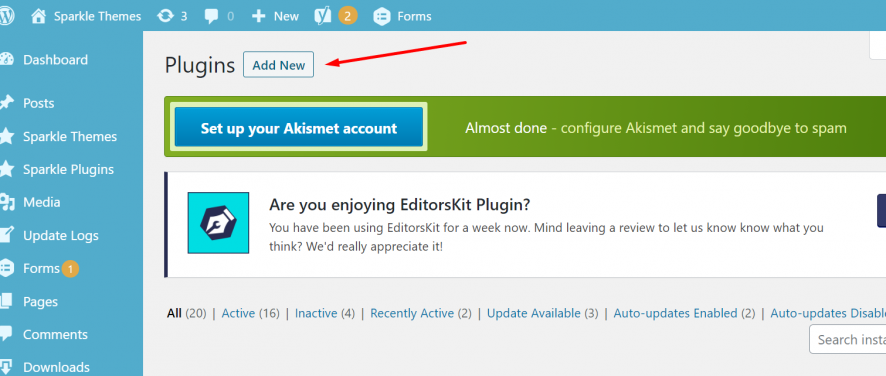
After the theme installation, the next step is to install the necessary plugins. Once your theme is activated, you’ll receive a notification to install them.
Fix the tiny details on general setting

This has to do with setting your WordPress properly.
Here is how to get it done:
- Go to the dashboard
- Go to settings
- Click on ‘general’
Here, you can fix the title and descriptions. You can also scroll down the dashboard and Site Address URLs to change it from HTTP to HTTPS. When you’re done, click on ‘Save’.
Store Setup
The exciting part is here! Now is the time to set up your store.
In the e-commerce world, there are features that you can’t do without, such as currency details, shipping, payment methods, etc. They have to be sorted out before people can make online sales. How do you go about this?
Here is a quick step to do this:
- Go to the plugin area
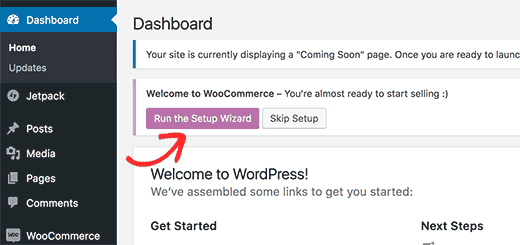
- Click on the plugin ‘woo-commerce’
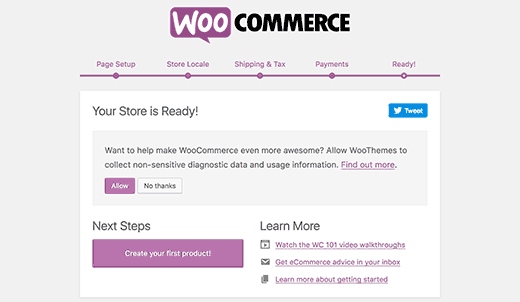
- On the welcome screen, click on the option for ‘run the setup wizard’.
- Once done, click on “continue’ to keep the plugin running.
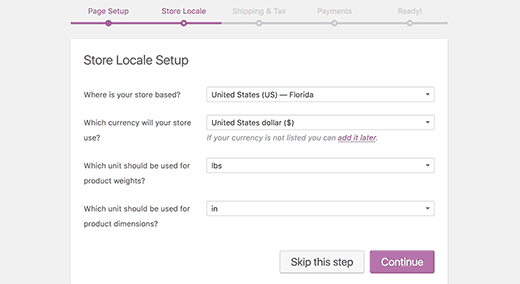
- Then, choose the location of the store and the currency you’ll be using for transactions
- Click on “Continue” to save your information.
Using Woo-commerce for your online store allows you to sell both physical and digital products. If you’re selling physical products, tick the box indicating “Will you be shipping products to customers?”
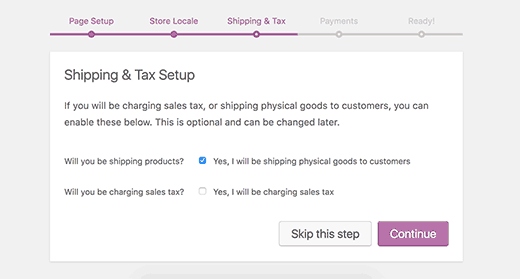
If you’re not, you can ignore it.
Tick and answer all necessary information regarding taxation. You can leave it if you don’t have a full idea about it for now and then come back later to manage the settings.
Click on “Continue”.
The next stop should be setting your payment method and settings. Woo-commerce uses PayPal and Stripe as its default payment methods, but you can change your preferences later if you want to add a different payment system.
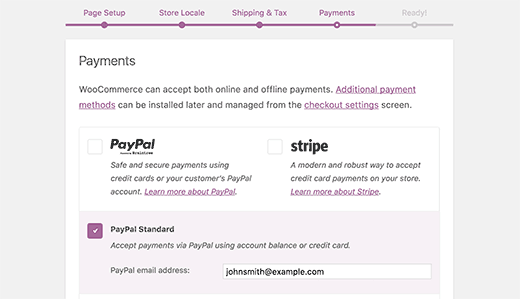
However, it’s encouraged that you go with PayPal or Stripe because it allows users to input their card information when checking out without having to leave the site.
Follow the instructions on the screen to set up your PayPal or Stripe payment system. Once completed, click on ‘return to dashboard’.
What are your products?
A store can’t exist without products, so now is the time to add your products to make your store official.
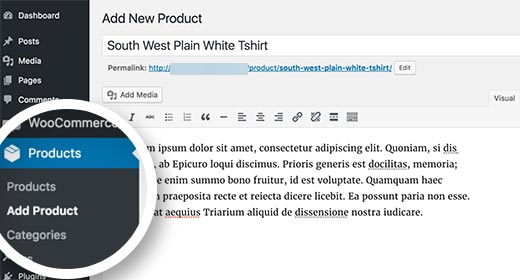
Go to Products, click on it and “Add New”. Add a title for the product and create a captivating and interesting description to attract customers. On the right side of the dashboard, you’ll see “Product Categories”. Click on “Add New Product Category”. This will help buyers browse through products easily.

To add specific product information like inventory status, price, shipping info and others, scroll down to “Product Data”.

You’ll also see another for a brief product description. Keep this short, simple, and straight to the point. On the right side, there are boxes for gallery items and product images.
When you’re done with all this, click on ‘Publish’ and your product will go live on the site.
You can add as many products as you want by repeating this process.
Store enhancement with Plugins
What you have now is a basic online store with some products for sale. But your online store can be improved with enhanced features like subscription forms, contact forms, sliders, image galleries, and many more.
All these tiny customizations are made possible through WordPress plugins. There is almost nothing you can’t achieve with plugins. All you need is to know what you want and figure out the plugin that can do it for you.
Look for these plugins in the WordPress plugin repository.
Other things you need to take care of are:
- Signing up for Google Analytics
- Signing up for Google Search Console
- Installing security plugins to protect your site
- Producing an XML sitemap and submit through Google Search Console
- Using plugins to integrate social profiles.
- Test-running the forms on the site and make sure it’s appropriate.
FAQs
- Must I pay for themes for my online store?
There are lots of free WordPress themes for online stores that are customizable. You mustn’t use a paid one if you like the free themes.
- Must I have programming or coding skills before starting an online store on WordPress?
No, don’t need any coding or programming skills to run a WordPress Online eCommerce store. WordPress Woo Commerce store is easy to use with a very efficient and simple dashboard.
- Can I be sure of WordPress’s safety?
Yes. WordPress is a safe platform to a great extent. You can also add security extensions and plugins to make it safer. Don’t forget to follow basic security rules and protocols.
15 Simple Tricks to Protect Your WordPress Site
- Should I use WordPress or Shopify?
Shopify involves monthly payment plans. But WordPress only needs you to pay for hosting and domain. No monthly payments required.
- Will I pay for Woo-commerce?
No. Woo-commerce is very free.
Conclusion
So, there you have your awesome WordPress eCommerce store live and running!
This detailed guide is sure to help you kickstart your journey into creating the online store of your dreams with WordPress. Drop your thoughts and experience with building an online store in the comment below.